1 desmontaje, Limitorque actuation systems 1, Flow control division – Flowserve MX Electronic Valve Actuator Manual del usuario
Página 110
Manual de mantenimiento y de piezas de repuesto de Accutronix MX
FCD LMLIM1314-00
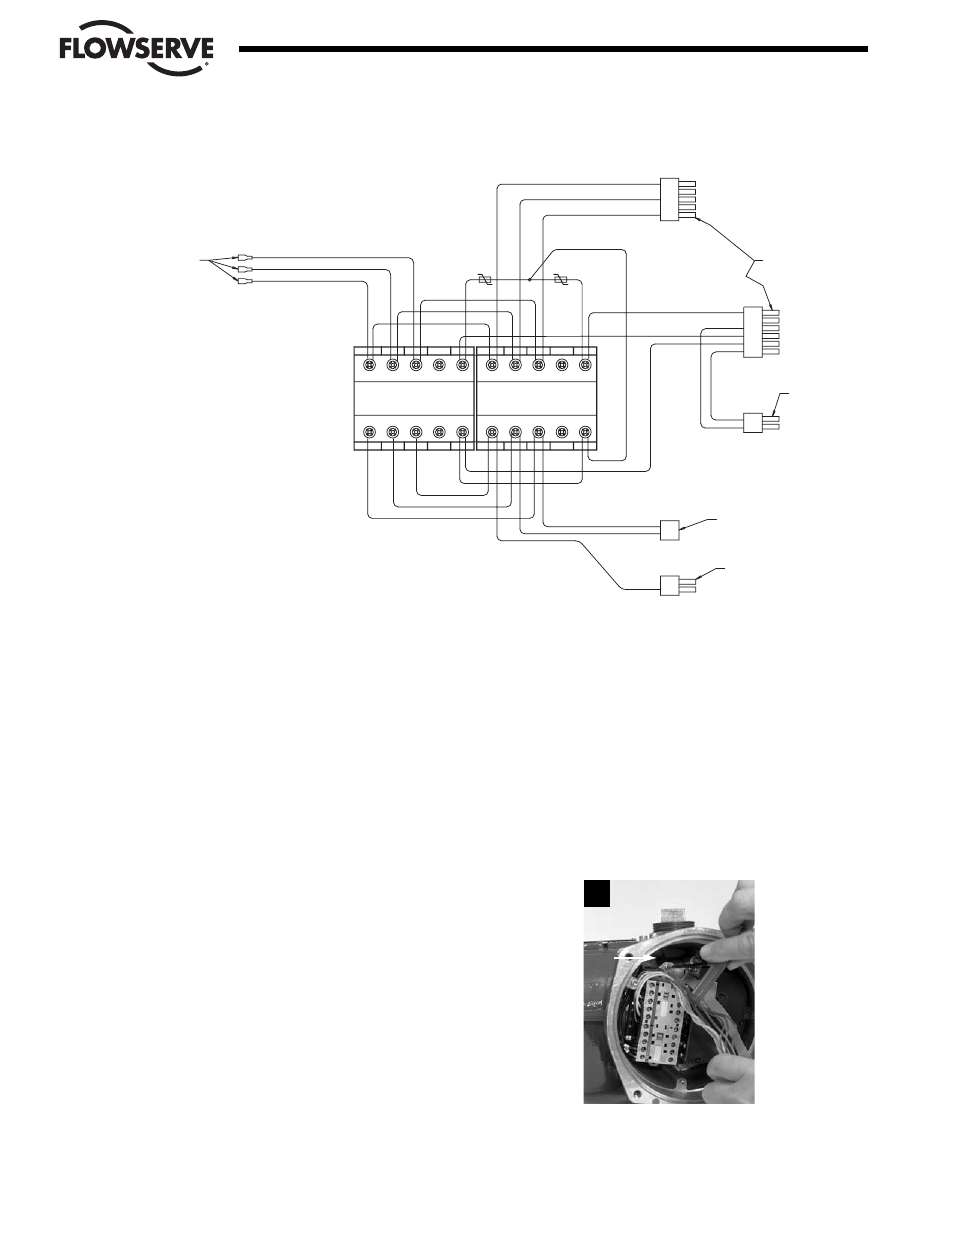
Figura 5.14 Montaje del contactor del módulo de control (continuación)
5.5.1 Desmontaje
EXTRAIGA PRIMERO
1. Extraiga el motor (submontaje #4). (Consulte la Sección 4.1.1.)
2. Extraiga el panel de control Accutronix (submontaje #7). (Consulte la Sección 5.1.1.)
3. Extraiga el módulo de control (submontaje #8). (Consulte la Sección 5.2.1.)
4. Extraiga el bloque de conectores (submontaje #15). (Consulte la Sección 5.4.1.)
PASO 1
Utilizando una llave hexagonal M3, afloje los dos tornillos de 4 mm (#8-28) que fijan el montaje del contactor al
actuador.
5-24
Flow Control Division
Limitorque Actuation Systems
1
8-28
1
1
5
5
4
4
3
3
2
2
L1
L1
L2
L2
3
3
L3
L3
5
5
NC
NC
21
21
2
2
4
4
6
6
22
22
T1
T1
T2
T2
T3
T3
A1
A1
A2
A2
1
1
L1
L1
L2
L2
3
3
L3
L3
5
5
NC
NC
21
21
2
2
4
4
6
6
22
22
T1
T1
T2
T2
T3
T3
A1
A1
A2
A2
1
1
1
2
3
4
5
6
2
1
2
1
2
1
A LA PLACA DE
ALIMENTACIÓN (P3 & P1
CONECTOR PARA
ENCHUFE AMP
ALOJAMIENTO DEL
CONECTOR MATE-N-
LOCK AMP DE 5 CLAVIJAS
(CONECTOR N˚ 1)
(CONECTOR N˚ 2)
(CONECTOR N˚ 3)
(CONECTOR N˚ 4)
(CONECTOR N˚ 5)
A LA PLACA OPC
AL MOTOR (P1)
CONECTORES 4 Y 5
RECEPTÁCULO D
MOLEX DE 6 CLA
RECEPTÁCULO DE
MOLEX DE 2 CLAV
ALOJAMIENTO DEL
CONECTOR
MATE-N-LOCK
AMP DE 2 CLAVIJAS
ALOJAMIENTO DEL
CONECTOR
MATE-N-LOCK
AMP DE 2 CLAVIJAS
MX-85 & 140