Optional command thc interface – Hypertherm HPR260 Auto Gas Preventive Maintenance Program Rev.5 Manual del usuario
Página 230
4
3
2
1
1
A
4
3
2
A
B
C
D
B
C
D
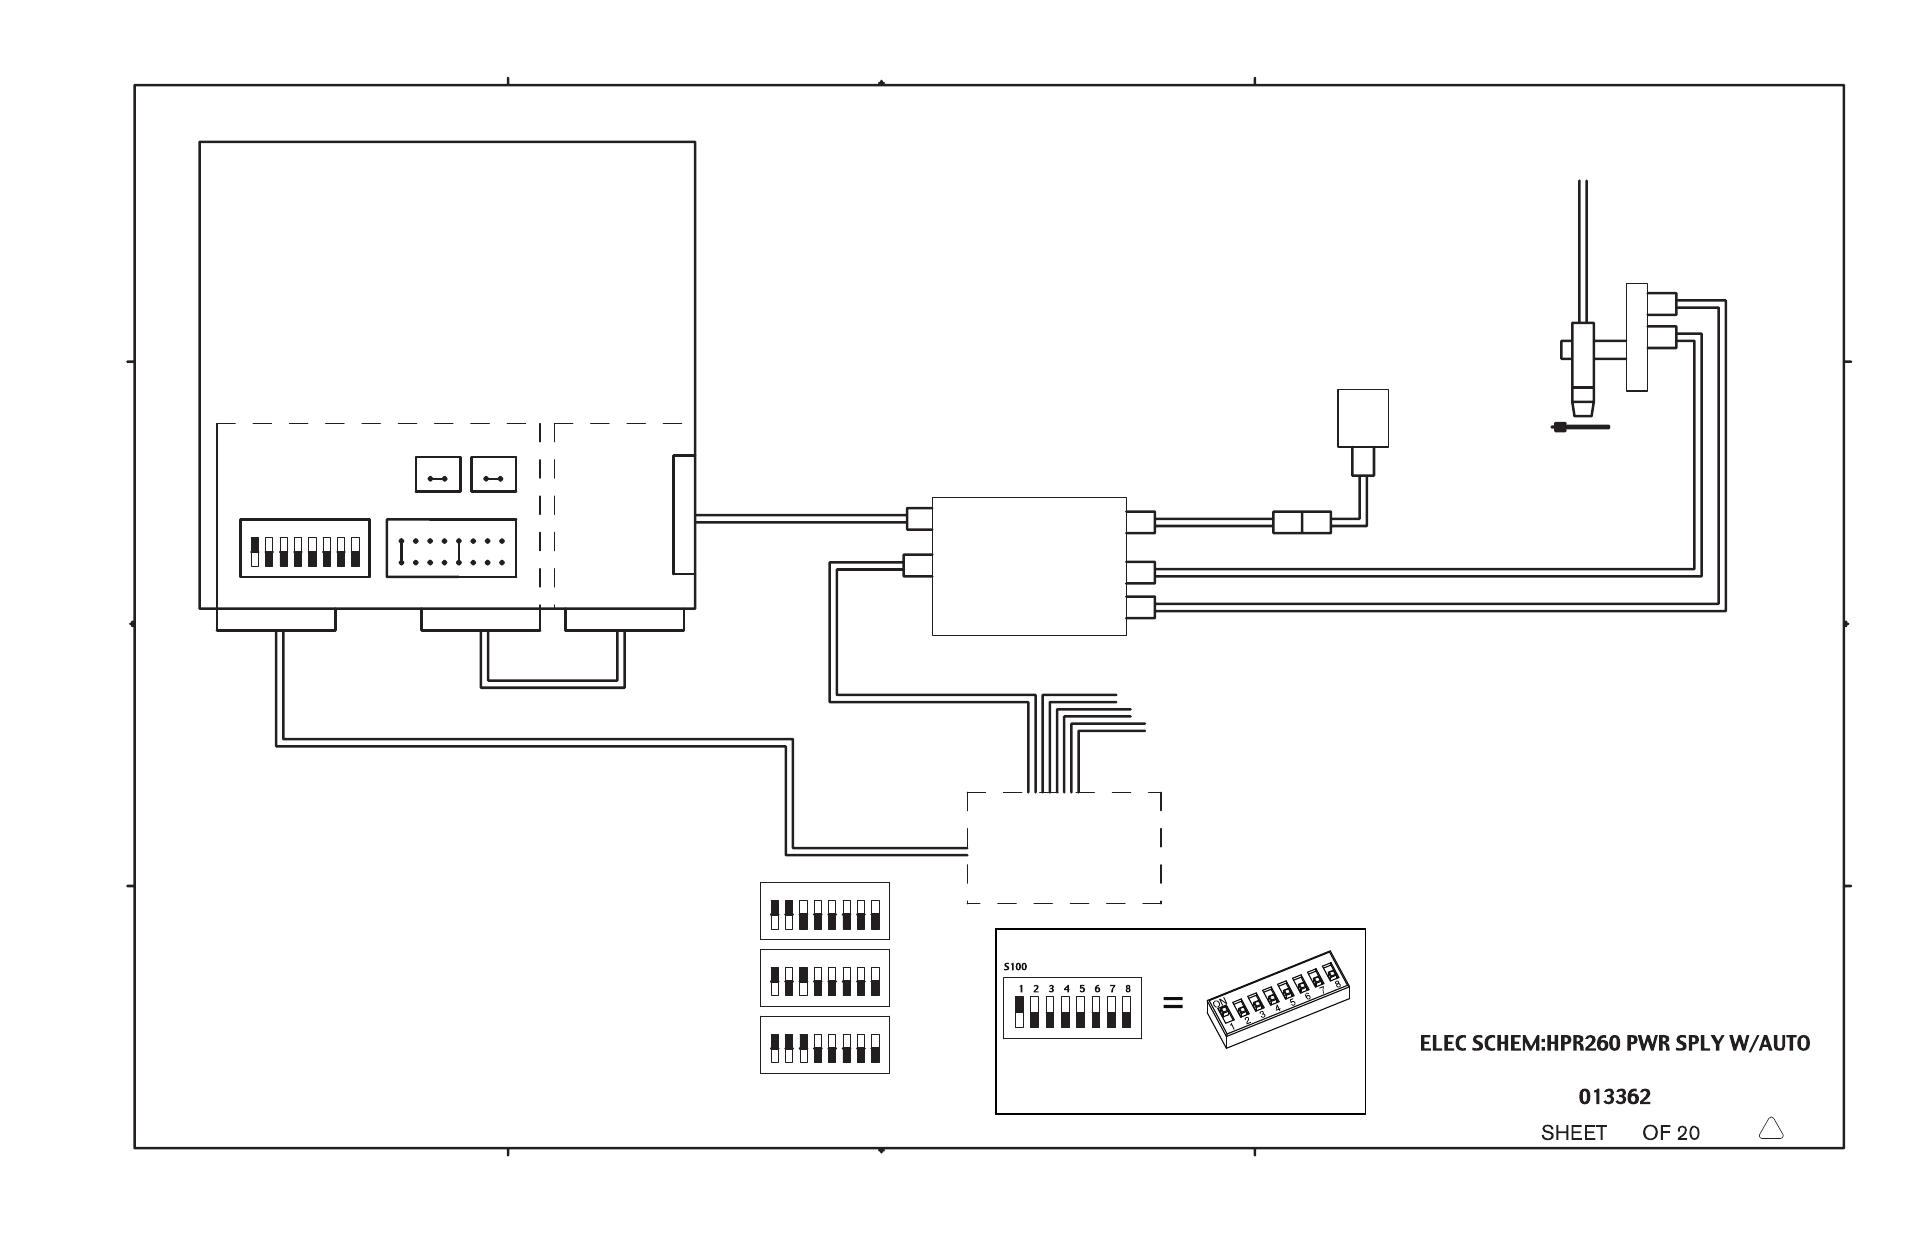
Interface
CNC
(Customer Supplied)
041909
CONTROL BOARD
S100
1 2
J303
3 4
3
2
1
4
J300A
J300B
CNC Interface Cable
Workpiece
CNC Interface Cable
(Optional Unit)
THC
Command
CNC Interface Cable
Pendant Ext. Cable
(Optional Unit)
Operator
Pendant
Lifter
Torch
(Optional Unit)
Motor Drive Cable
Lifter I/O Interface Cable
J2B
J2A
PLASMA INTERFACE BD
041842
Serial ID
Dipswitch
Jumper Block
Machine Motion
CNC Interface Cable
Command I/O Cable-Second THC
Command I/O Cable-Third THC
Command I/O Cable-Fourth THC
Serial ID
S100
S100
Serial ID
S100
Serial ID
1 2
J106
1 2
J107
Optional Command THC Interface
1
3
2
4
1 2 3 4
1 2 3 4
1 2 3 4
5 6 7 8
5
7
6
8
5
7
6
8
6
5
8
7
Torch
Notes:
1) For a single system installation set Serial ID (S100),
Machine Motion (J303), J106 & J107 as shown
2) For a two system installation duplicate a second power supply and Command THC
as illustrated for a single system, set Serial ID as shown for the second system
3) For a three system installation set up as described above, set Serial ID as shown
for the third system
4) For a four system installation set up as described above, set Serial ID as shown
for the fourth system
5) All machine interface cables (Pwr. supply-CNC) used for serial communication between
Pwr. supply-CNC will have a common connection node with the CNC
6) The CNC will need a dedicated I/O port for each Command THC
HPR PAC
Dry Cutting System
D
20
See Command THC
Manual for internal
Power Supply wiring
Dipswitch
(2 systems)
Dipswitch
(3 systems)
Dipswitch
(4 systems)
7-26
5
Dipswitch setting example:
Switch 1 is in the ON position.
Switches 2-8 are in the OFF position.
*
*
* If a Hypertherm Automation controler is being used, and there are intermittent
communication failures (PS Link Failure), try removing the jumpers on J106 and J107
on the control board, and the termination jumper (J6 or J8) on the serial isolation board
in the controler. Only remove the termination jumper on the serial isolation board that
is connected to the HPR power supply. See sheet 19 of 20 for more details.